Launch Windows 10 without a password (in 2020)
To automatically start Windows with the latest version
Previously, user accounts had a check box that said "Users must enter a name and password to use this computer." It was enough to uncheck the box, and you are no longer asked to enter the password every time the computer boots, which is less tiring for me.
But in later versions, this option disappeared. That doesn't mean we can no longer get rid of security controls as distasteful as control when you enter a public place. The latter may be necessary when he, but when you get access to your own machine, which you alone use, and which does not contain top-secret documents, it is more annoying.
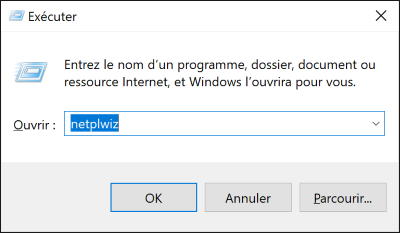
1) Press the Windows key and the R key on the keyboard .
2) You must enter an application name. Enter:
netplwiz
and click OK.
3) The user accounts window will appear. In an older version of Windows, the Use password or not check box is selected. If available, clear the check box, click OK, and you're done.
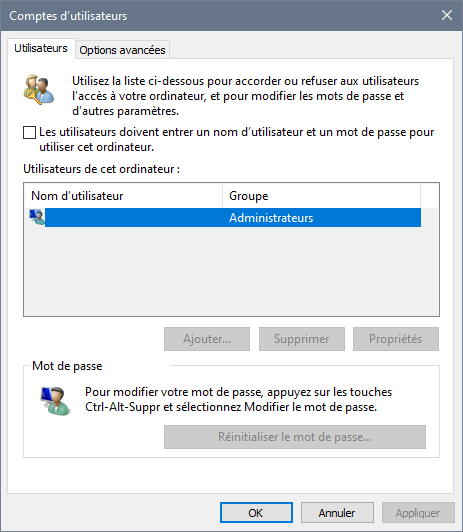
Otherwise, go to step 4.
4) In the new version, click Add to create a new user.
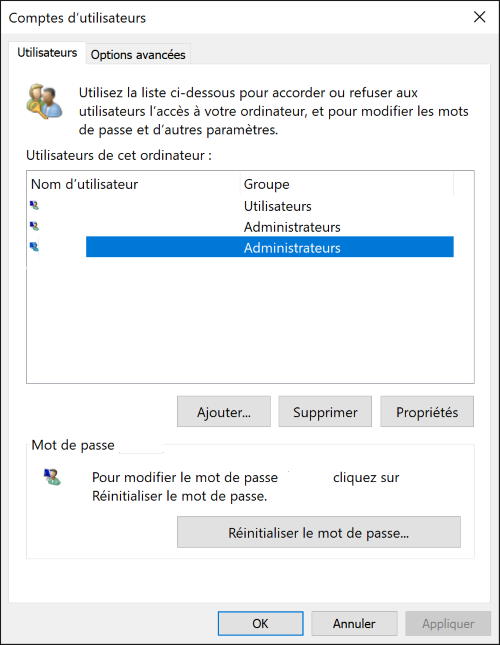
5) Enter a new name and leave the password fields blank.
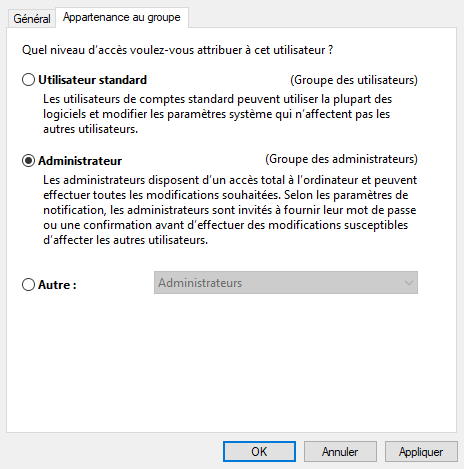
6) You can later change the account type to Standard or Administrator. At least one administrator account is required on the device.
7) When you start, you are still asked for the password for the current account, but you also present a list of users. Select a new account and continue starting the session.
You can go through the various steps of setting up this new account. During subsequent sessions, the launch will be direct.
Starting without a password is faster than with, as it uses a different, simplified home screen. You are not asked to choose an account, even if there are several of them, this is done only on the home screen with a password. If you subsequently need to change your account, it is enough to close the session, and on the screen for entering a new session, you will be asked to select an account .