How to turn a photo into a drawing with Gimp
The new filter in version 2.10 makes the operation very easy...
The classic method is to duplicate an image that displays paths. To do this, make the image monochronous and use the on-board detection function Gimp. At this stage, a pencil drawing is obtained that can be used as is.To add colors, the image becomes translucent, and the original image copied to the second layer appears between pencil strokes.
 |
 |
|
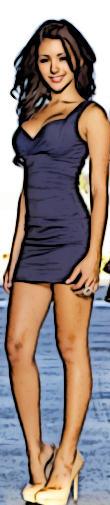
Original photo |
Drawing |
Get pencil drawing
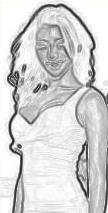
The manual method allows you to play on multiple image enhancement parameters, but it gives good results only if the image is simple, poor in detail. However, it allows you to get a pencil drawing.
- Upload Image.
- Duplicate Layer.
- Select the source image by clicking the layer . In
- Colors menu, click the Desaturation submenu, and then click Desaturation.
In the dialog box, select Medium. In - Filters menu, click Edge Detection, and then click Edge. In the dialog box, select the Sobel algorithm. In
- layer window and always on the source layer, select Notch Only.
- Merge layers in the Layers menu.
- Export a new image.
New simplified method
The appearance of a new filter in Gimp 2.10 makes operations much easier...
- Upload Image. In
- Filters menu and Art submenu & submenu; Comics. You have options to refine or enlarge the line. In
- Color menu, select Color Enhancement.
- Perhaps sharpening can be improved if a photo has too much noise. In the Filters, Enhancement menu, select Noise Canceling.
- Export an image to PNG or JPEG.
 |
 |
 |
Original |
Pencil wood-burning |
Enhanced colors |
It is also possible to make a pencil drawing with an art filter "Photocopy." Playing on a percentage of black and white, you make the image more or less close to the picture.
In addition, by installing the Beautify plugin, you add a Beautify filter that can do the same.
Other comics filter experiments
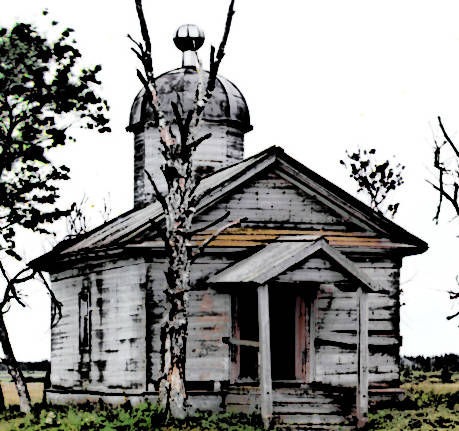
Abandoned chapel:
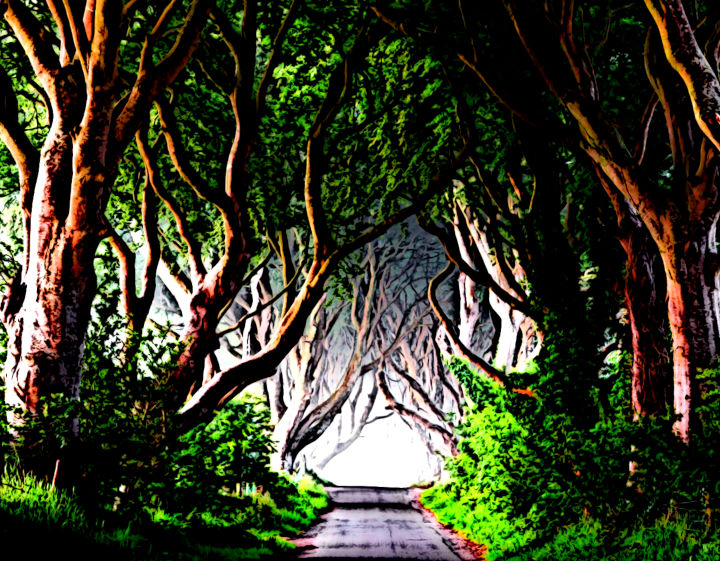
Path to the dark forest:
See also...