Elementary transformations on images in Canvas
Inversion, 90 degree rotation, magnification, basic image operations in HTML 5.
For these basic operations, we will use functions built into the JavaScript extension for canvas, as well as a routine that reads the contents of a pixel image by pixels and plays it in canvas. This feature, unlike the built-in features, allows you to create your own effects, especially for colors.
For example, you can reduce the level of transparency by starting from left to right if you want to merge one picture into another, as is done with Gimp. This is not the topic of this article, but I would still clarify that this can be done by changing the alpha value in the RVBA color code (red, green, blue, alpha).
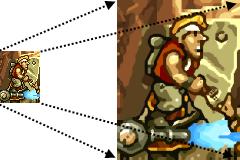
Below is an image that we will use as a demonstration to test the transformations. These sailboats on the blue sea (mediterrane) will undergo all kinds of manipulations of the functions, the code of which we will give.
Zoom In with Zoom
The scale function allows you to change the size of the image, and the following routine shows its use: load the image into the img tag, and then change the display in the canvas tag, indicating the magnification factor. Everything that will be shown next will be shown with this magnification, and this will apply to the drawImage function used to display our image. The size of the canvas tag is also determined depending on the magnification factor.
<canvas id="canvasid"></canvas>function transform(canvasid, filename, scale) {
var viewCanvas = document.getElementById(canvasid);
var viewCtx = viewCanvas.getContext("2d");
var imageSource = new Image();
imageSource.onload = function () {
viewCanvas.width = imageSource.width * scale;
viewCanvas.height = imageSource.height * scale;
viewCtx.scale(scale,scale);
viewCtx.drawImage(imageSource, 0, 0);
}
imageSource.src = filename;
}
transform("canvasid", "image.jpg", 2);Extension using JavaScript algorithm
We want to read a pixel image and reproduce it in the same way, increasing pixels, so we have to save the original image in a temporary canvas tag that is not displayed. The second tag is used for the converted image.
The drawImage function displays the image in a hidden channel after loading. The getImage function converts it into a matrix of points in which you can access the pixels separately, which the getColor function does. The rgba color property is then constructed and assigned to a rectangle that represents an element with a given magnification factor.
<canvas id="temporary" style="display:none"></canvas>
<canvas id="canvasid"></canvas>

function getColor(imgdata, x, y, width) {
  var index = (x + y * width) * 4;
  r = imgdata.data[index + 0];
  g = imgdata.data[index + 1];
  b = imgdata.data[index + 2];
  a = imgdata.data[index + 3];
  return 'rgba(' + r + ',' +  g + ',' +  b + ',' +  a + ')';
}

function transform(canvasid, filename, scale) {
  var i, j, it, jt;
  var tempCanvas = document.getElementById("temporary");
  var tempCtx = tempCanvas.getContext("2d");
  var viewCanvas = document.getElementById(canvasid);
  var ctxtarget = canvasTarget.getContext("2d");

  var imageSource = new Image();
  imageSource.onload  = function () {
    var w = imageSource.width;
    var h = imageSource.height;
    tempCanvas.width = w;
    tempCanvas.height = h;
    tempCtx.drawImage(imageSource, 0, 0, w, h);
    viewCanvas.width = w * scale;
    viewCanvas.height = h  * scale;
    var sourceData = tempCtx.getImageData(0, 0, w, h );
    ctxtarget.beginPath();
    for (i = 0; i < w; i++) {
      it = i * scale;
      for (j = 0; j < h; j++) {
        jt = j * scale;
        var color = getColor(sourceData, i, j, w);
        ctxtarget.fillStyle = color;
        ctxtarget.fillRect(it, jt, scale, scale);
      }
    }
  }
  imageSource.src = filename;
}

transform("canvasid", "image.jpg", 2);
The quality is not very different in this case, but this is not always the case. As can be seen from the comparison of super-resolution tools (link at the bottom of the page), the interpolation agorhythm used by canvas can improve rendering. But our routine allows you to control whether each image element is needed.
Horizontal inversion
To display an inverted image, that is, from right to left, the same function is used as for zooming with a modified loop:
var it = 0;
for (i = w - 1; i >= 0; i--) {
  for (j = 0; j < h; j++) {
    ctxtarget.fillStyle = getColor(sourceData, it, j, w);
    ctxtarget.fillRect(i, j, 1, 1);
  }
  it++;
}
Image scanned from right to left. Pixels are not placed in a new image with the same horizontal coordinate as the original images, but with a value that increases from zero.
Horizontal inversion with built-in elements
There is no flip function in canvas, but the same effect can be obtained by changing the way the content is displayed as with the translate and scale functions.
function hflipBuiltin(canvasTarget, image, w, h) {
  canvasTarget.width = w;
  canvasTarget.height = h;
  var ctxtarget = canvasTarget.getContext("2d");
  ctxtarget.translate(w, 0);
  ctxtarget.scale(-1, 1);
  ctxtarget.drawImage(image, 0, 0);
}
The code is very simplified compared to our inversion function. Horizontal coordinate movement is performed to start the display on the right. A negative value is then specified for the right-to-left display. All that remains is to use the drawImage function to display the image.
Vertical inversion
To capitalize on this transformation requires that the image itself be upended. Then you can build a scene starting from the bottom, not from top to bottom, as is the default. For the game, for example, it would be more intuitive.
Replace the loop in the previous algo with this one:
for (i = 0; i < w; i++) {
  var jt = 0;
  for (j = h + 1; j >= 0; j--) {
    ctxtarget.fillStyle = getColor(sourceData, i, jt, w);
    ctxtarget.fillRect(i, j, 1, 1);
    jt++;
  }
}
In the absence of any changes to the image other than inversion, the same simplified function as horizontal inversion can also be used with these two changed lines:
ctxtarget.translate(0, h);
ctxtarget.scale(1, -1);
Rotate 90 ° clockwise
The calculation of new dimensions is simplified in this case: in the case of a rectangle, the height and length are changed. We don't change anything to a square.
In order to take into account its movement, you must transfer the source. It corresponds to the height of the image.
function rotate90(canvasTarget, image, w, h) {
  canvasTarget.width = h;
  canvasTarget.height = w;
  var ctxtarget = canvasTarget.getContext("2d");
  ctxtarget.translate(h, 0);
  ctxtarget.rotate(Math.PI / 2);
  ctxtarget.drawImage(image, 0, 0);
}
Note that the width of the canvas was assigned the height of the image, and the height of the canvas was assigned the width of the image.
Rotation shifts the image. To counteract this offset, a horizontal motion equivalent to the height of the image is performed. This is only suitable for 90 ° rotation.
90 °Reverse Rotation
This time, the coordinate movement is based on the width of the image. The same function is used as before, simply by changing this string:
ctxtarget.translate(0, w);The full source code of all these functions plus the command shell. This code can be used in projects as long as the copyright notice is saved.
To enlarge images before placing them in canvas or outside canvas, the tools implement amazing algorithms, of which here is a selection...
Zoom Tools