Button pusher
While we are fully focused on sorties, it's time to ask Arduino to listen, watch and feel.
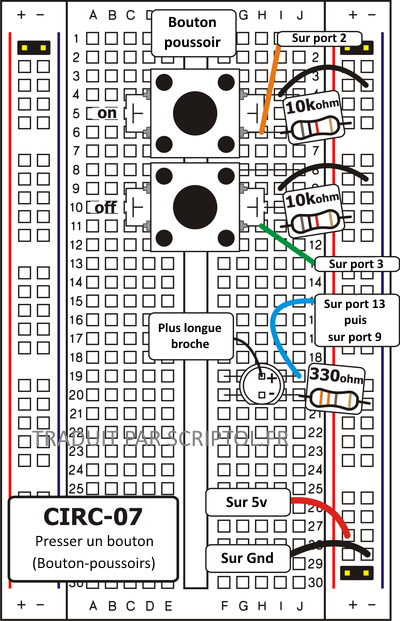
We'll start with one button. Connecting the button is easy. There is a component, a reminder resistance, that may seem intractable. It is turned on because the Arduino does not feel like us (the button is released by pressing the button). On the contrary, it looks at the voltage on the port and decides whether it is HIGH or LOW. The button is set to turn on the Arduino HIGH port when pressed, when it is released, the port voltage will float (which leads to possible errors). To give the Arduino reliability by seeing the port as BAS when the button is released, add reminder resistance.
(Note: The program in the first example uses only one of the two buttons).
COMPONENTS
- 5 mm LED.
- Push button x 2.
- Resistance 330 ohms (orange-orange-brown).
- Resistance 10 kOhm (brown-black-orange) x 2.
- Connecting wire.
CIRCUIT DIAGRAM
CIRCUIT INSTALLATION

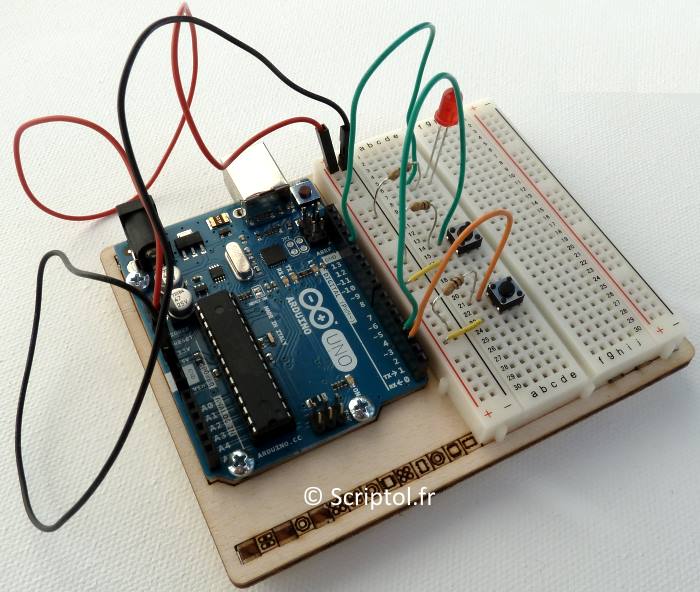
Photo of the translator's scheme
CODE
var five = require("johnny-five"),  onButton, offButton, led;

five.Board().on("ready", function() {
  onButton = new five.Button({
    pin: 2
  });

  led = new five.Led(13);
  onButton.on("down", function(value){
    led.on();
  });

});
EMERGENCY REPAIR
Annunciator does not come ON
The button is square and because of this it is easy to insert it incorrectly. Turn it 90 degrees and see if it starts working.
(NdT: The push button pins are slightly screwed in. A pair of pins thus with a screw screw screw is placed in the width direction of the prototype card. You should also disable the card, redirect it and immediately launch the program to make it work).
The light does not fade
A little stupid mistake that we constantly make when you go from simple on off to molten, think about moving the LED lead from port 13 to port 9. (NdT: This does not apply to the previous example, but to the last one at the end of the page).
Not impressed?
Don't worry, these schemes are super simplified to make it easier to familiarize yourself with the components, but as soon as you combine them together, the sky becomes the only boundary.
CODE EXTENSION
To the off button
The initial example might sound a bit disappointing (we don't really need an Arduino for that), so let's make it a bit harder. One button turns the LED on and the other turns it off. Add the following to your code:
offButton = new five.Button({
    pin: 3
});
offButton.on("down", function(){
    led.off();
});
You can find this code in CIRC-07-code-button.js
Gradual and degressive molten
Let's use the buttons to control the analog signal. To do this, you need to change the LED connection from port 13 to port 9, and also change the code to use the fadeIn and fadeOut methods. These methods have a parameter controlling the melt rate.